
How To Sand A Cedar Deck
The Sand & Stain System
(1 of 3)
Sanding is the first step to setting up your deck, fence, or exterior wood project for longevity and success. It may not be the funnest activity you’ll ever do, but if this crucial prep work is done how we recommend it, you won’t have to prep sand it for years—and perhaps ever again.
Unless you have pressure treated wood, do not skip this step. You need to sand your cedar wood deck, even if it’s brand new and hasn’t grayed yet. This is because it has what’s called mill glaze (also known as mill sheen) on its surface that even penetrating oils will not be able to soak into as easily as they should.
Remember, the two biggest reasons a deck fails (peels, blisters, cracks, chips, etc.) is because of: 1) poor prep work, and 2) product quality or type. Here’s how we avoid that first reason and how to get it right the first time.
What You’ll Need
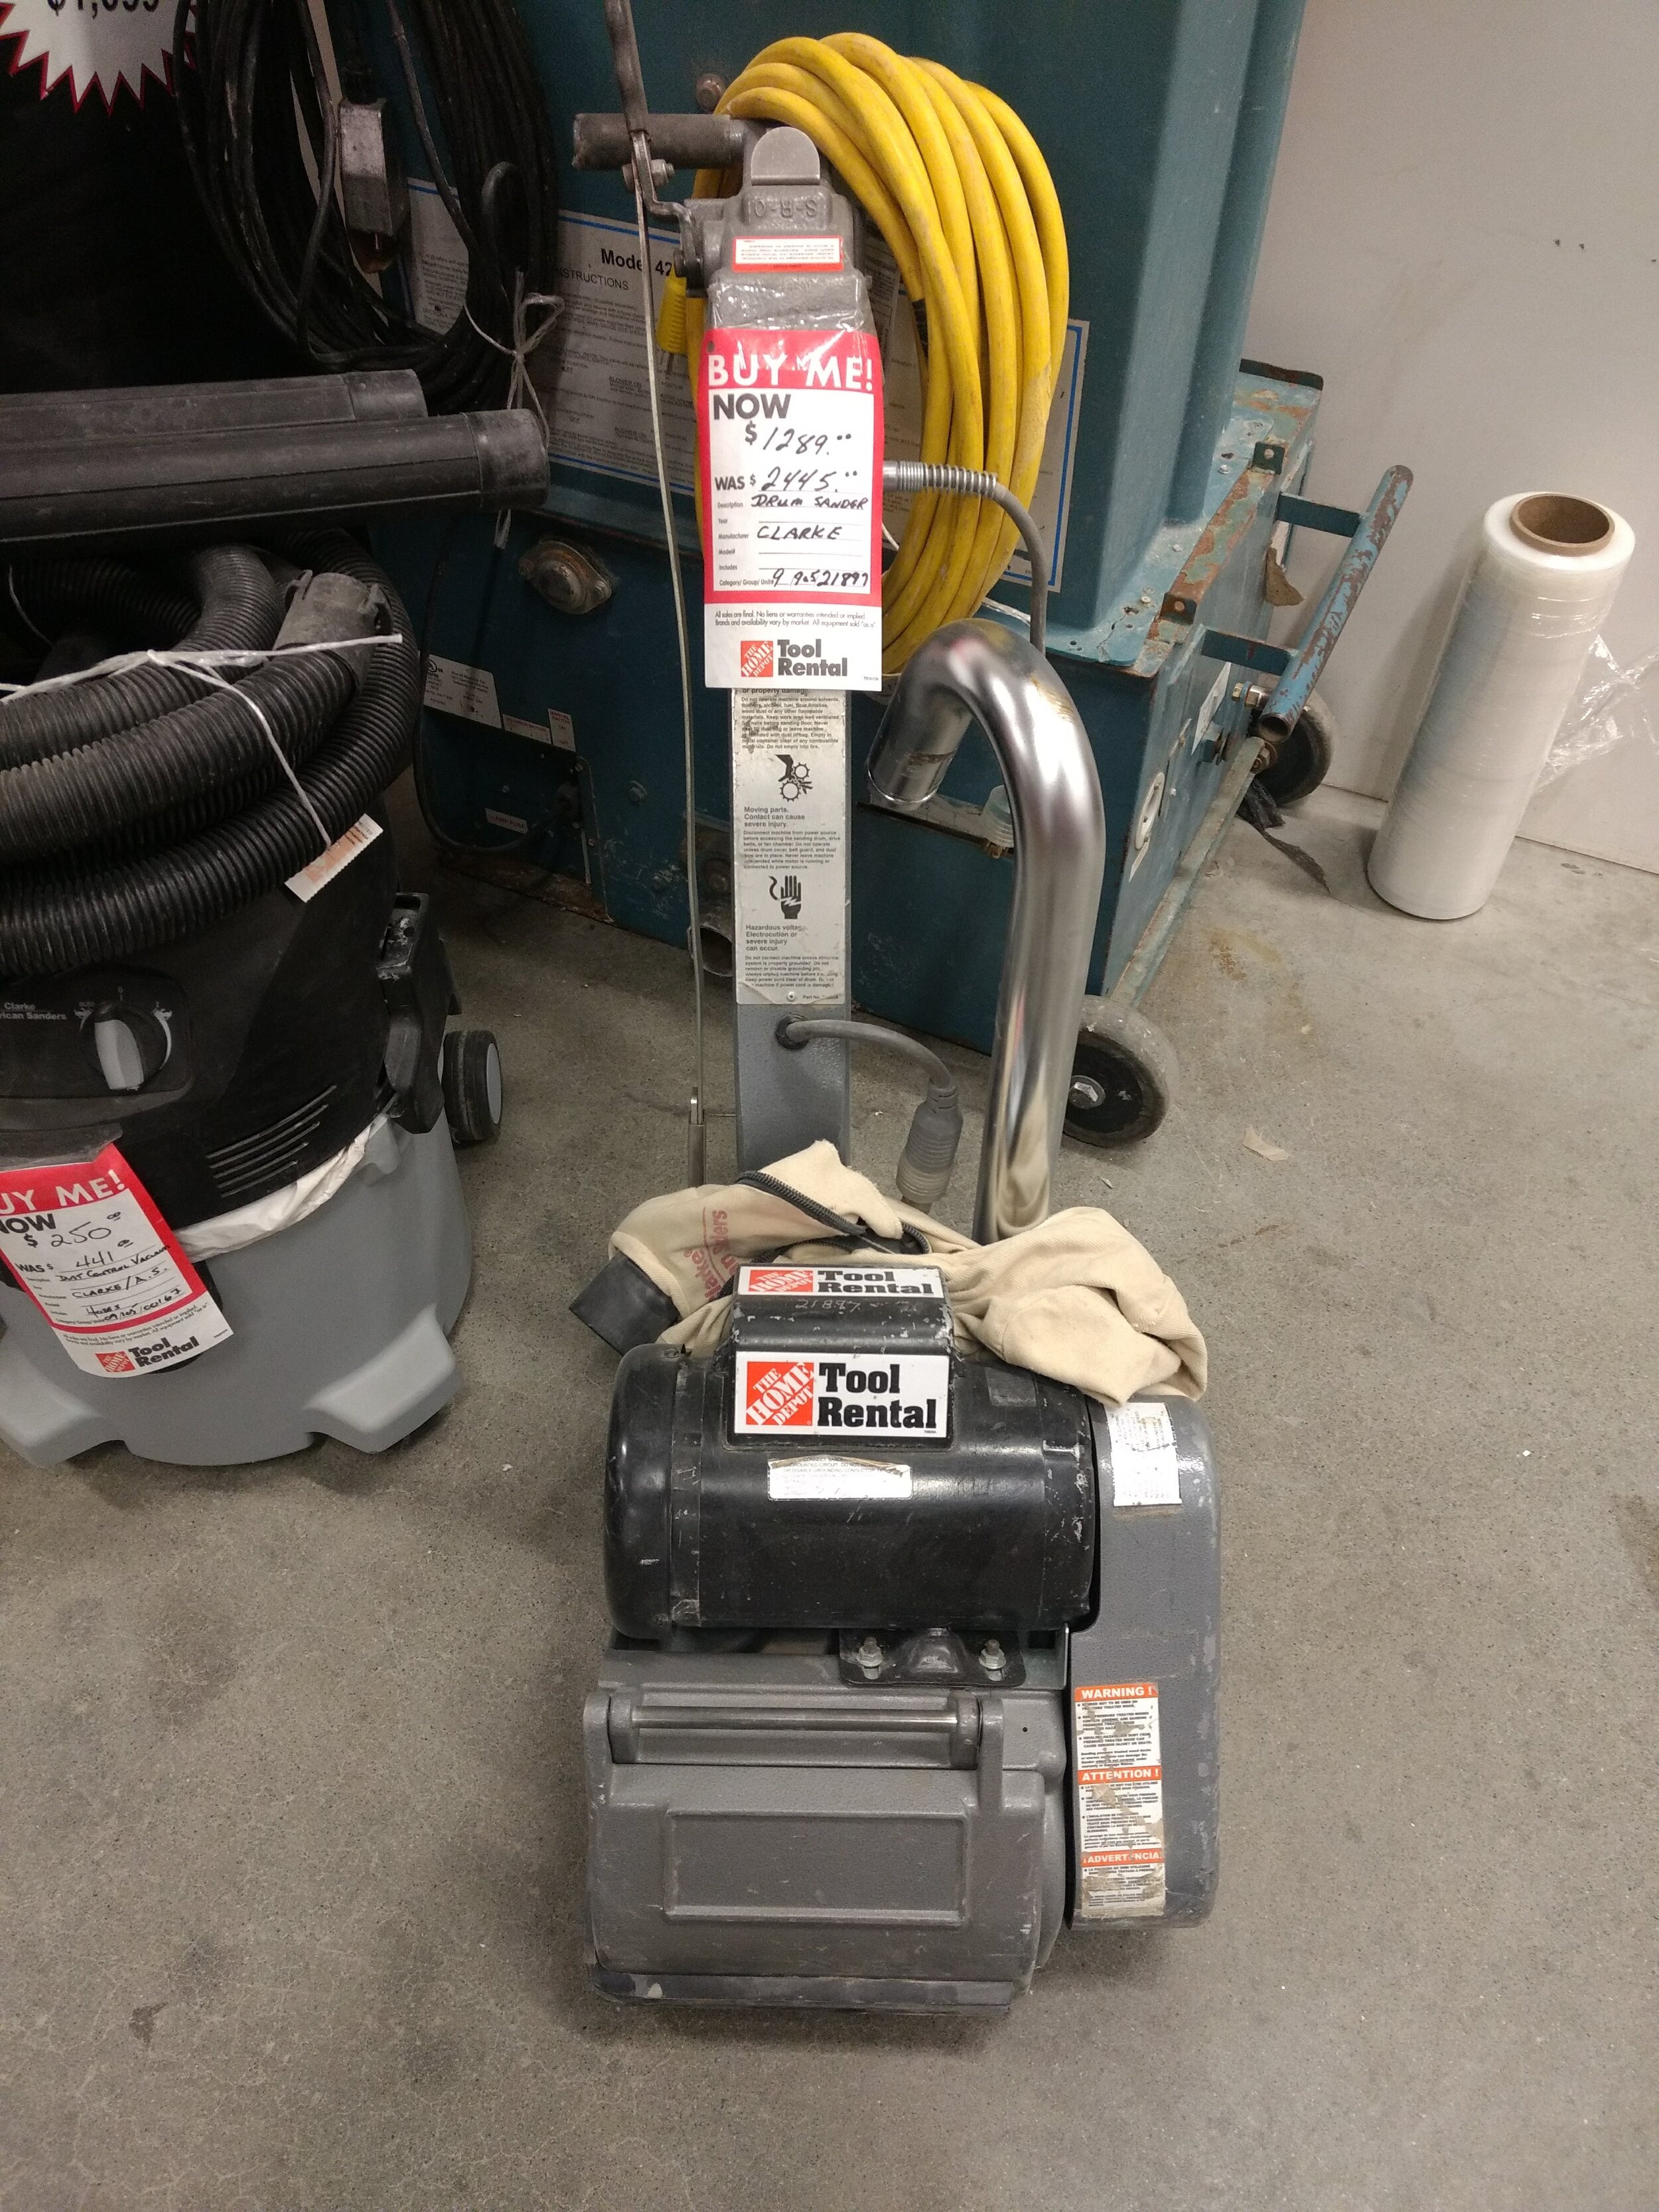
Floor Sander
Whether your deck is large or small, you’ll want to get through the work as quickly as possible. Enter: floor sander. This can easily be rented at your local equipment/machinery rental shop (or right here at our online Stain & Supply Shop if you are in the Ottawa & surrounding area.) Double check to make sure the sandpaper rolls / sheets are the right kind and size for the corresponding floor sander type.
For the sake of simplicity, this article is in reference to the Clarke American EZ-8 Drum Sander and the Clarke American Floor Buff Sander the standard drum sander that is available for rent in North America cities.
NOTE: You could also use sanding pads on the Clarke American Square Buff (another floor sander for rent at Home Depot.) This is a large rectangular surface that vibrates as you guide it in the direction you want versus a drum that spins quickly that you steer. With the drum sander, you’ll only push along the grain of the wood—never across the grains.
Pro DIY & Contractor Tip…
If you’re renting from Home Depot, some stores / staff are more strict than others and you may not permitted to rent these sanders for exterior use—only interior hardwood floors.
So tell them you’re sanding your interior floor if they ask what you plan to do with this drum sander…
Random Orbital Palm Sander
Although much smaller, random orbital sanders leave the nicest finish and will be used for the perimeters that your floor sander can’t reach, as well as getting into the grooves of the boards for planks that are cupped, bowed, etc. that your floor sander can’t reach after a few passes.
These can also be rented, but can be purchased relatively inexpensively (+/- $100) and could come in extremely handy for tons of other DIY projects. Random orbital sanders come in different sizes, but for the sake of consistency, we will be referring to the 5”, 8 hole, sanders that almost every tool company offers.
Contractors may want to consider the DeWalt brand as they seem to last the longest when in use for 12 hours a day consecutively. For the DIYs out there, you should be fine with any of them that work.

Pro DIY & Contractor Tip…
Contractors may want to consider the DeWalt brand as they seem to last the longest when in use for 12 hours a day consecutively. For the DIYs out there, you should be fine with any of them that work.
Mouse Sander
The mouse sander gets into all the corners and details hard-to-reach areas. Your mouse comes to a point in the shape of a tiny clothes iron, or you can change the head to a longer “finger” tip that allows your to reach further into areas, like the floor section underneath your railing that the palm sander can’t reach, etc.
If your deck is flat with no railings or wood posts, you could get away without a mouse sander and simply hand sand any corners the random orbital can’t reach. You’ll realize very quickly why you want to do as much with the floor sander and orbital as possible before moving onto the mouse…
It’s tiny and slow and the heads need to be replaced frequently (which you only get one of each in the box, so you’d have to order these separately.

Pro DIY & Contractor Tip…
These “finger” tips are typically used for interior applications in small areas for short amounts of time. Outside, these will last an extremely short time. You can get replacement heads at your local DeWalt / Black & Decker Factory Outlet store, or conveniently get them right here at our online Stain & Supply Shop for DIY & contractors.
Sandpaper
Needless to say, you’ll need the sandpaper to the corresponding sander unit. We recommend using 60 grit sand paper for both floor sander (drum sander or square buff) and random orbital sander—perhaps a 40 grit to start if extremely weathered with deep grooves or sanding hardwoods like Ipe. As with anything, some brands are better than others. The exact brands we use are available in our DIY & Contractor online store.
NOTE: Sanding softwood is different from hardwood. You do not need to sand over 3-4 times in various grits like you do with interior hardwood flooring— especially when your deck is outside and will get beat up from the elements and you won’t be able to enjoy that 200 grit smoothness for very long regardless.

Pro DIY & Contractor Tip…
Mouse sanders are typically meant for detailing work, so it might be hard to find sandpaper coarser than 80 grit (or worse, come in variety packs with 80, 120, and 200 grit, for example.)
We eliminate this problem by using the same sandpaper we use for random orbitals and simply cut them to fit the mouse “finger” heads. In fact, cutting the sandpaper disc fits pretty well onto the finger tip head on the mouse, and will get your job done faster with the courser grit (and blend perfectly versus having a finer smoothness in only the areas where the mouse sander was used.)
Drill
A drill can be used to remove spindles for easier sanding access, as well as resetting the screws on a deck floor before starting with the floor sander to avoid sparking or tearing floor sandpaper roll. A basic drill will do, but a hammer drill will be tougher on stubborn screws with more punch and make the task go faster.
Some deck floors are fastened with no nails heads or screws showing from the top. In this case, screw resetting will not be necessary.
Safety Equipment
Safety equipment is a bit more obvious, so for the sake of simplicity, here is a list of items we recommend using while staining a deck to prevent injury and encourage ease. Please consider purchasing items you require conveniently located on our online Stain & Supply Shop.
Safety glasses
Dust & vapour mask
Oil resistant gloves
Sun hat
Knee pads
Deck Sanding Order Of Operations
All decks are different. This is the order we would sand a cedar deck if it was flat with no trim, and perhaps a skirt. If your deck has any vertical areas (railing, posts, pergola, privacy wall / fence, etc.) you may want to sand those areas first and then do the floor last.
This is especially true if you only have a few days before it will rain next and depending on how many people you have on the job. Not to mention you’ll be walking on this the whole time, so you want the least amount of dirt to get on the wood after sanding as possible prior to staining.
The following is the exact order we would sand a deck floor and which tools we’d use for each step.
1) Reset Screws
Before using any sanders, you will want to reset screws by drilling the screw heads down so they are just below flush with the deck boards so they aren’t sticking up while sanding.
This will prevent sparking with the floor sander and prevent putting holes in sandpaper rolls and sheets used on drum sanders and floor buff sanders respectively.
If you have spindles and wish to remove them for easier sanding, a drill can be used to remove the screws quickly and effectively, and then re-install after sanding and / or staining.
2) Base Sanding
In interest of making this process as efficient as possible, we’re going to start with the largest sander first: the floor sander. I suggest doing 2-3 passes with the drum along the decking planks using 60 grit sandpaper rolls. Anything beyond that is likely a cupped board that the drum sander can’t reach.
If you’re using a floor buff sander, you can spend a bit more time in an area by holding it steady or moving it back and forth versus a drum sander where you will only be moving along the plank and the grains of the wood. Never move a drum sander perpendicular to the direction of the floor planks.
Do as much as you can with the floor sander before moving onto the random orbital, as it will do the most work with the least amount of effort at the fastest speed. A drum sander will typically chew faster and deeper through old layers than a floor buff sander but a floor buff may be a better bet for blending if the boards are unlevel, bowed, angled, etc.
When you are finished base sanding with either type of floor sander, the majority of your deck floor should be sanded besides the perimeters and deeper grooves in the planks.
NOTE: We typically use drum sanders versus a square buff in our operations, but both advantages. Buff sander are handy for boardwalks and decking platforms that doesn’t allow for enough room to push the drum sander along the planks of the wood.

3) Perimeters & Trim
When the base sanding is done, you’ll need to sand the perimeter and even out any darker spots on the decking planks the floor sander couldn’t reach with a random orbital sander using 5”, 8 hole, 60 grit sandpaper. The random orbital is designed to blend in any missed spots and can be angled slightly to dig into these deeper areas if it can’t be reached when it’s held flat.
You’ll notice the random orbital takes much longer than the floor sander because of its smaller size and lesser power, so make sure you use the floor sander as much as you could before jumping onto the palm sander (unless there are two of you working at the same time.)
You’ll need to use the orbital for vertical areas that a floor sander obviously won’t be able to reach, like:
the risers of steps
skirting
posts
pillars
privacy fences

Pro DIY & Contractor Tip…
Spindles are probably the most time consuming area to sand on a deck… When it comes to sanding, be thankful if your railing is glass / metal / plastic versus wood.
If you do have spindles, use a drill to unfasten them if possible. Clump them together and use the random orbital to sand 3-4 spindles at a time on each side. This is way faster (and way less of a pain) than sanding each spindle individually.
If your spindles can’t be removed, you can get away with sanding the exposed faces with a random orbital (facing the inside and outside of the deck) but you’ll have to use a mouse sander in between as the orbital is too large to fit in between the spindles.
4) Detailing
Detail sanding is the last step that will be performed with the mouse sander, and lastly: hand sanding. This includes:
corners the random orbital can’t reach with its round sanding face
underneath railings
in between spindles (if they aren’t removable as mentioned in the DIY & Contractor Tip above)
risers that are smaller than 5” that the random orbital won’t fit in
The Black & Decker brand mouse sander comes in a small clothes iron shape with a removable interchangeable head that can be swapped with a “finger” to reach even further than the pointed iron.
Iron shape is useful for larger areas, like the riser of a step that an orbital might be too big for, but we generally keep the “finger” heads on and try to do as much as we can with the random orbital sanders and only leave the tiniest details for the mouse.
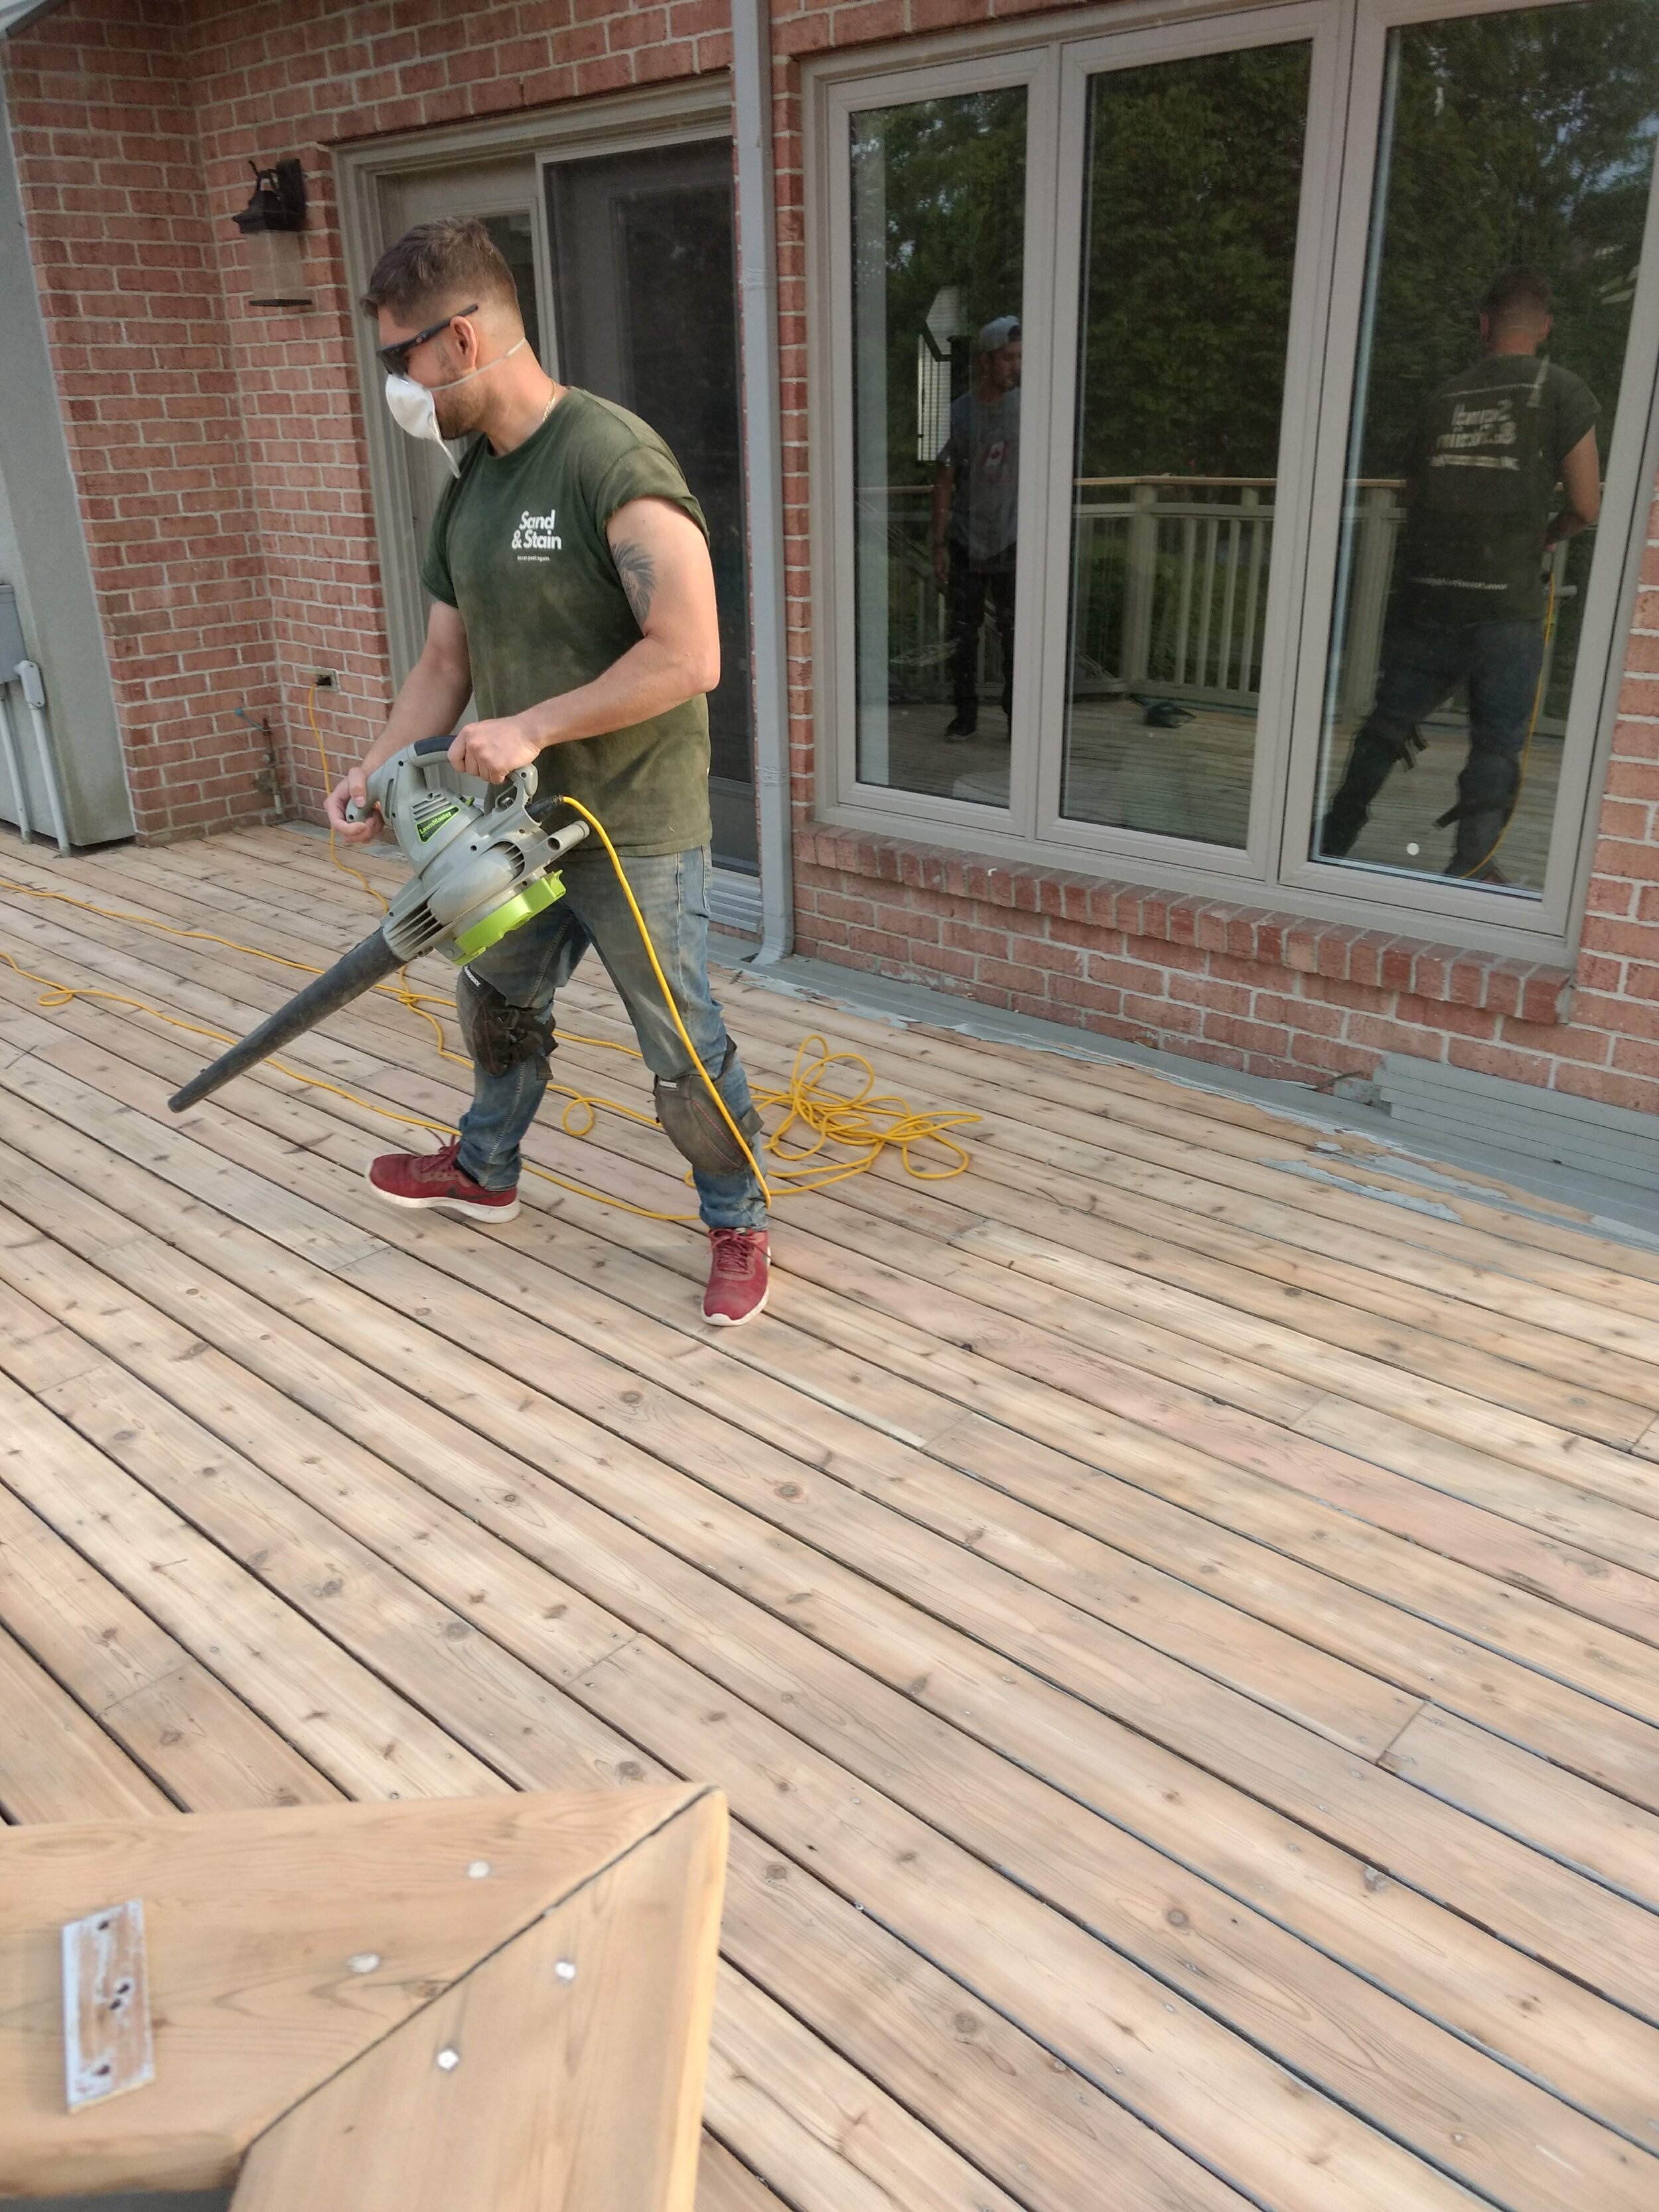
5) Dust Removal
Finally, when sanding is done, give the deck a final clean with a shop vac, leaf blower, compressor unit, etc. to rid of all sawdust, dirt, leaves, etc. You may want to clean periodically throughout the sanding process and you’ll need to empty dust bags on the sanders anyways.
Floor sanders have bags and fans that capture most of its sanding dust. Random orbital sander and mouse sander bags/compartments won’t catch as much—this is normal. Empty as needed and do not let the sand bag overflow so it does not overheat and spontaniously combust.
Always be sure to give the deck a final vacuum or blow before staining, especially is sanding takes longer than one day for larger projects. You do not want sanding sawdust stay on the deck overnight. This can lead to morning dew moisture mixing with the sanding dust leading to clogged pores, bumpier surfaces versus smooth, and creating more work for yourself to sand over the same areas again before staining.
Pro DIY & Contractor Tip…
If using a leaf blower, blow away from your home, pool, stone pathways, etc. to prevent mess and future cleanup in other areas.
This may seem obvious, but really do try to aim the dust away to prevent angry neighbours, not to mention zero control over breeze direction in an already messy job. Again, a shop vac is a great solution as well to handle most of the dust before a final blow.
Check out How To Stain A Cedar Deck— Part 2 the Sand & Stain System.
Or, jump to How To Maintain Your Deck So It Never Peels— Part 3 of the Sand & Stain System.